
5 Easy Cane Webbing DIY Projects for Beginners
Ever scroll through Pinterest and feel that pang? You see those beautiful, airy homes full of texture and think, “I wish my place looked like that.” Then you see the price tag on a designer rattan headboard or room divider, and the dream fades.
I’ve been there. But here’s a little secret: that luxe, boho-chic look isn’t about money. It’s about material. And the most transformative material for DIY is sitting right here: cane webbing.
You don’t need to be a master carpenter. If you can use a pair of scissors and a staple gun, you’re qualified. These five projects are my absolute favourites for beginners. They’re fast, affordable, and the results will have your friends asking, “Where did you buy that?” The best part? You get to say, “I made it.”
Let’s turn that inspiration into action. Here are five cane webbing DIY projects anyone can tackle.

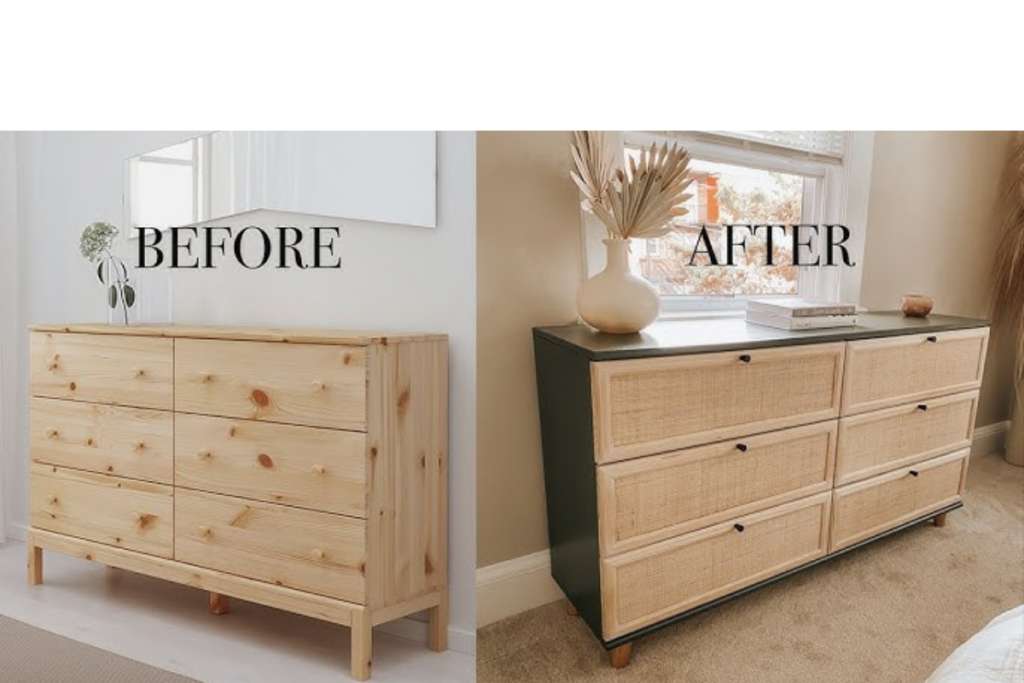
Project 1: The Instant-Boho Bedside Table Makeover
Time: 1-2 hours | Cost: Very Low | Skill: Super Easy
We all have that one piece of furniture. The plain, boxy bedside table or old desk that does its job but has zero personality. This is the perfect beginner cane webbing project.
What you’ll do:
You’re not rebuilding the whole table. You’re just giving it a “face-lift.” Measure the front of one drawer. Cut a piece of cane webbing to be slightly larger than that panel. If you’re using natural cane, give it a quick 10-minute soak to make it flexible.
Then, simply use a strong adhesive (like a good wood glue or clear construction adhesive) to stick the webbing directly onto the drawer front. Press it down, wipe away any glue that seeps out, and place a heavy book on top until it dries. That’s it.
Once dry, you can trim any tiny overhanging edges with a sharp blade. Suddenly, that boring table has texture, depth, and a totally custom look. Do both drawers, and you’ve transformed the whole piece in an afternoon.
Why it’s great for beginners: No fancy tools. If you mess up the cutting, you just snip another piece. It’s instant gratification.
Project 2: The Light & Airy Lampshade
Time: 45 minutes | Cost: Almost Nothing | Skill: Easy
Lighting is everything. A new lampshade can cost a fortune, but covering an old one? That’s a genius easy cane webbing idea.
Find a simple drum-style lampshade (the cylindrical kind) that you already own or pick up a plain one for cheap. Measure its height and circumference. Cut your cane webbing to these dimensions, again adding a little extra.
Wrap the webbing around the shade. Use small dots of hot glue or super glue to secure the top and bottom edges on the inside of the shade, where the glue won’t be seen. Overlap the ends neatly and glue that seam down. When the light is turned on, the pattern will cast the most beautiful, delicate shadows across your room.
Pro Tip: Use a battery-operated LED light inside for a cord-free, magical accent light in a corner or on a shelf. It’s pure boho home diy magic.
Project 3: The Framed Wall Art / Decorative Screen
Time: 1.5 hours | Cost: Low | Skill: Easy
Art doesn’t have to be a painting. Texture is art. For this simple rattan craft, you need a picture frame—any size, any shape. Thrift stores are full of them. Remove the glass and backing.
Cut your cane webbing to fit inside the frame. Staple it to the back of the frame, pulling it snug as you go. Start in the middle of each side and work outwards to keep the tension even. Reattach the backing, and you’re done.
Hang it alone for a minimalist statement, or create a gallery wall with three frames of different sizes. You can even make a small triptych screen for a dressing table by hinging a few tall, thin frames together. It’s a rattan decor diy project with huge visual impact.
Project 4: The Chic Sliding Door or Cabinet Insert
Time: 2-3 hours | Cost: Medium | Skill: Intermediate Beginner
This one feels advanced, but the process is very straightforward. It’s the ultimate cane webbing furniture makeover. Got an old cabinet, wardrobe, or even a plain sliding closet door? You can give it a high-end, custom look.
This project uses the “proper” method with a spline (that thin reed that locks the cane in), but don’t let that scare you. If your door has a groove already, it’s meant for this! You’ll need a spline roller, a small hammer, and wood glue. Following a step-by-step cane webbing installation guide makes this process much easier for first-time DIYers.
The basic steps are: measure, cut, soak (if natural), press the webbing into the groove with the roller, glue the groove, and gently tap the spline in with a hammer to lock it all in place. It requires a bit more patience, but the professional, finished look is so worth it. It transforms flat, boring surfaces into focal points.
Project 5: The Versatile Plant Holder / Wall Basket
Time: 30 minutes | Cost: Very Low | Skill: Super Easy
Got a scrap piece of webbing left over? Don’t throw it away! Make a plant holder. This is a fantastic modern cane webbing project.
Cut a rectangle of webbing. Fold it in half widthwise and staple or sew the two side seams together. You now have a simple pouch. Attach two loops of jute rope or leather cord to the top corners. Hang it on a hook on your wall and drop a small plastic nursery pot inside. The cane hides the plastic pot, and your trailing pothos or spider plant gets a beautiful new home.
It’s perfect for small spaces, adding greenery without taking up floor or shelf space. Make a few in different sizes for a gorgeous, organic wall display.
CONCLUSION
The biggest hurdle is just starting. Pick one project this weekend. Let the simplicity of it surprise you. The snip of the scissors, the smell of the natural cane, the moment you step back and see what your own hands made—that feeling is what DIY is all about. It’s not about perfection; it’s about creating a home that has your fingerprint on it.
Ready to make your first cut?
All the cane webbing and supplies for these projects are waiting for you. Browse our collection, pick your first roll, and let’s see what you create. Cane Culture shares ideas, materials, and guidance that help beginners confidently explore cane webbing DIY projects.
Frequently Asked Questions
I’m totally new. Which project should I try first?
Start with Project 1 (the drawer front) or Project 5 (the plant holder). They require the fewest tools and let you get a feel for the material with zero pressure.
Natural or Artificial cane for these DIYs?
For all indoor projects (like the art, lampshade, and drawer), natural cane webbing is perfect for its authentic look. For the plant holder or any project that might get damp, or if you live in a very humid area, artificial cane webbing is a worry-free choice. For beginners, artificial is often easier as it doesn’t need soaking.
A clear comparison of natural vs artificial cane webbing can help you decide based on location, humidity, and ease of use.
What basic tools do I really need?
To begin: a sharp pair of heavy-duty scissors, a measuring tape, and a strong adhesive (like a glue gun or wood glue). For the framed art or drawer, a basic staple gun is helpful. For the cabinet door (Project 4), you’ll want to get a spline roller kit.
Where can I get the materials in India?
You can find everything you need—from flexible cane webbing rolls to spline and tools—right here at Cane Culture. We make sure our materials are DIY-friendly.